

Introduction
Remix is no doubt the most popular online Integrated Development Environment (IDE) for writing code smart contract code for EVM-targeting languages.
But what many developers don’t know is that they can use this code editor for languages other than Solidity. This is understandable, as solidity is the default mode that appears on the landing page with no almost zero hints that would tell the average developer user that it could compile code written in other languages, such as VyperLang.
By the end of this quick three minutes guide you would have the step-by-step knowledge that shows you how to enable the VyperLang plugin on Remix and compile your very first .vy contract.
Prerequisites
Before you continue reading this How-To guide, be sure to make sure you're familiar with the terms listed above to ensure smooth use of this article.
Getting Started
Now let's get started on how to enable the Vyper smart contract compiler on Remix.
The first step is to visit the official landing page of Remix here.
Next, we locate the Plugin logo on the left side of the landing page.

- Click on the plugin icon and scroll down until you see the option for ‘Compile Vyper contracts’. Click on Activate to start installing the plugin.
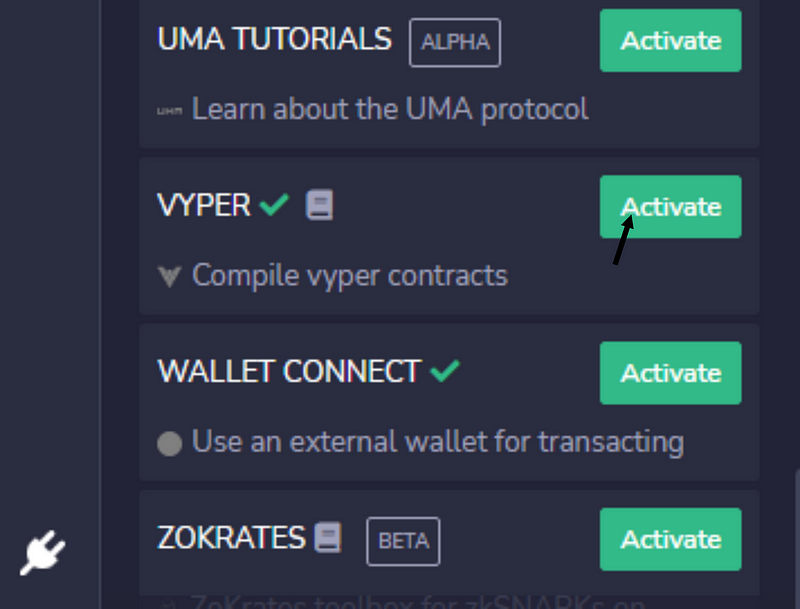
(Activating the Vyper compiler).
You’ll know you’ve done this well when the Vyper logo appears on the side of your screen (see figure below).

(The Vyper logo as seen on the landing page).
- The next step is to create a new file and save it with
.vyso the compiler knows it's a Vyper contract we're trying to save.
Example: HelloWorld.vy
- Then, we copy and paste any Vyper smart contract and compile it using
CTRL + Son Windows andCMD + Son a Mac.
Trying it out
For a first-hand experience, you can copy and paste the code below to compile your very first Vyper smart contract using Remix IDE.
Copy the code below:
# @version ^0.2.0

greet: public(String[100])

@external
def __init__():
    self.greet = "Hello world"
Paste the code into your newly created HelloWorld.vy file, then click on the Vyper logo and switch from local compiler to remote compiler.

(Switching to remote compiler).
Click on ‘Compile contracts/HelloWorld.vy’ and the output you get should be similar to the one below.

(The green tick means our contract has been successfully compiled!).
Note: If this article is up to six months old at the time you are reading it, then your output might look slightly different than this, as the team behind Remix is constantly making updates to it that come with maintenance and further development.
If it is similar then you’ve succeeded in compiling your first Vyper smart contract on Remix. Great Work!
Conclusion
VyperLang is slowly becoming popular and is already the second most preferred Ethereum smart contract language coming in only behind Solidity.
The more the Ethereum blockchain evolves, the more in-demand Vyper smart contracts would be. Now is the best time as a developer to familiarize yourself with the language, and if you're already eager to build amazing stuff in VyperLang, follow the links below to learn from great tutorials.
Note: If the output on your screen doesn’t match the one above and you find yourself running into errors despite following the guide step-by-step, feel free to leave a comment and I’ll check in to help you out.
Interesting Links
To quench your thirst for more VyperLang content, I suggest you look at the following links below:
Learn how to build amazing stuff from Vyper-by-Example.
You've come to the end of the article. If you enjoyed it and found it informative, leave a like. If you have any questions, leave a comment. If you want more simplified articles like these, leave a follow.
Click on this link to get in touch with me on my socials. See you next time.